






Categories
- Raw Wood Veneer
- Paper-Backed Veneer
- Edge Banding
- Vacuum Press Items
- Veneering Supplies
Shop by
Veneer Species
Build Your Own Vacuum Press

Veneer Supplies Newsletter



DIY Vacuum Bag Construction
A guide to making your own vacuum bag for veneering
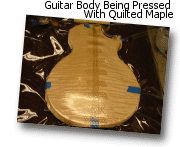 The process of making an airtight bag can be challenging. Users often tell us about all the time they spend making a custom vacuum bag and taking all the necessary steps to prepare and seal it, only then to notice it has a leak. In this article, we'll help you avoid this problem. There is a secret to getting it done right, and we'll tell you more about that at the end.
The vinyl that is typically used to make a vacuum bag can be purchased from companies that make boat covers or canvas awnings. Some fabric stores also offer this material, but it tends to be a bit thin. If you have a difficult time finding vinyl for the bags, it can be purchased on our website. There are a few different thicknesses available in vinyl membrane sheeting. The most common are 20 mil (.02") and 30 mil (.03"). Either will work, but thicker material is typically more durable.
Polyurethane bag material is also available but if this is your first attempt at bag construction, then consider building it from vinyl instead. Polyurethane will last longer, but it is more expensive and tedious to bond.
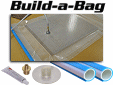 A Better Option?
The assembly process can be frustrating and time-consuming. A better option may be to purchase a Build-a-Bag kit if you are short on time and/or patience. The kit makes do-it-yourself vacuum bag construction easier and faster.

- Vinyl cement is required to make your own vacuum bag. We do not offer vinyl cement, but it is easily found online. It is extremely flammable and will destroy your brain if used in a poorly ventilated area.
- Vinyl cement used with the polyurethane material offered on our website will take longer to cure. Plan for 24 hours for a durable bond to be made.
- Any area that is to be cemented should be cleaned first with acetone or xylene. Synthetic steel wool or 'Scotch Brite' pads will help.
Tools and Parts
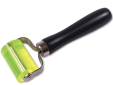 Seam Roller |
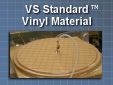 Vinyl Material |
 Polyurethane Material |
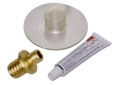 Flush Mount Stem |
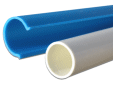 Vacuum Bag Closure |
Part 1: Cut and Seal the Vacuum Bag
Though it can be time-consuming, it is not difficult to construct a DIY vacuum bag for veneering. This is especially true for bags that are made from vinyl because polyurethane requires more prep work and clamping than vinyl. When making a custom vacuum bag, you may prefer the seams to be as even as possible. That is easier said than done. Luckily, there are some steps that can help remove some of the frustration.
- For flat panels, start by determining the project size and adding 6" to the width and 12" to the length. Let's use an example project size that is 48" wide and 60" long. To make a custom bag for this panel, you will need two pieces of vinyl that are 54" wide and 72" long.
The extra length allows room for the bag closure to be applied. As shown in the following image, the extra 6" of width allows the bag to pull together at the seam. If the bag is too small for the project (or the project is too big for the bag) then the seams will pull apart while under vacuum.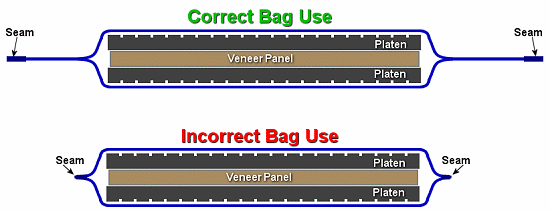
- It's best to have about 1" of area where the vinyl will be bonded together to make the seam, so clean those areas with acetone or xylene in a well-ventilated area. Don't forget that only three sides of each piece of vinyl need to be cleaned. The fourth side is left open so that the project can be inserted.
For a rectangular shaped bag, it makes the most sense for the open side to be one of the narrow ends of the rectangle. Don't bother to clean the side of each piece of vinyl material that will be the opening of the bag. - Set the second piece of vinyl over the first piece on a smooth flat surface. Align the edges of the bag material around all four sides. It is critical that the vinyl is kept flat with no bubbles or raised areas at the edges or in the middle of the bag.
- Start with a side of the bag that is closest to the opening and work your way around to the other side of the opening.
- Carefully lift the top layer of vinyl away from the bottom layer in increments of roughly 12 inches. Apply a coat of vinyl cement to the edge about 1" wide and let the top layer gently rest back down on the bottom layer as you go along. Have a helper follow behind you with the seam rolling tool as you work through this process. That person should roll/press the two materials together using very firm pressure with the seam roller. Continue this process around the bag until you reach the other side of the bag opening.
- Keep rolling the seam area for several minutes until the bond is secure. Alternatively, some people have opted to use flat boards to clamp the seam for 30 to 60 minutes.
Polyurethane Users: The bonding process with this type of material takes much longer. The seams will need to be firmly clamped for 24 hours.
Part 2: Attach the Bag Stem
The flush-mount bag stem allows you to use the full length of the vacuum bag without worry of project surface imperfections caused by the protrusion of the standard bag stem. These bag stems have a specially designed 2.5" diameter 50 mil flange molded onto the valve body which gets cemented onto your vacuum bag. A barbed brass insert then gets pushed into the valve body and locks in place. This stem is designed to work with our lock-on connector.
- Mark the location on your vacuum bag where you wish to install the bag stem. For convenience, we recommend installing the stem 15” out from the bag opening. The location will not affect the pressure inside the bag.
- In the selected area, cut a 3/8" diameter hole in the vacuum bag using scissors or a razor knife.
- A small tube of cement is included with your bag stem kit. This cement will work with both vinyl and polyurethane materials. Be sure to follow the safety instructions included with the cement and wear appropriate eye, skin, and lung protection when using this product.
- In a well-ventilated area, clean the mating surfaces of the bag stem body and the vacuum bag with acetone. A synthetic abrasive pad will help maximize the effectiveness of the cleaner. When completed, the cleaned areas should look dull and abraded.
- Apply the cement to the bottom of the valve body and to the vacuum bag area where the bag stem will be attached. Be sure there is full coverage on both pieces.
- For vinyl, allow 3 to 4 minutes for the cement to set up. Then apply the valve body directly over the porthole (step 2). Using adequate pressure, smooth out the bag stem flange until any air bubbles are removed. A wood roller is helpful with this process. Allow 1 hour of drying time before using the vacuum bag.
- For polyurethane, immediately set the valve body directly over the porthole after application of the cement. Gently massage out any air bubbles but try not to squeeze out too much of the cement. Allow 24 hours of drying time before using the vacuum bag.
- Insert the brass barbed valve that is included with the bag stem. Proceed carefully since the edges of the barbs are sharp. Once inserted, the valve core is not easily removed.
Part 3: Buy or Make the Bag Closure
The bag closure will be used to close the open end of the bag after you have inserted the veneer, substrate, and platens. Getting a good seal is not difficult. Read more about closures below to see which is best for you.
Method 1: Tube & Sleeve or C-Channel Closure
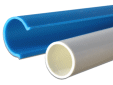 This type is the most common closure system sold with vacuum bags. We have this bag closure in several lengths. Simply roll the bag end over the tube. Then snap the C-channel over the bag starting from one side and working towards the opposite side. To ensure a perfect seal, be certain that the entire bag opening is secured by the closure and that there are no wrinkles in the bag material.
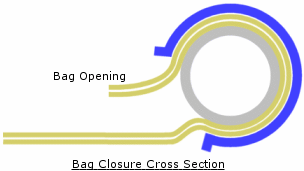
Additional Notes:
- For additional clamping strength, you can attach spring clamps over the C-channel. This is not necessary under normal conditions, but it will provide a better seal if the bag is heavily worn.
- There is one thing to note about this type of closure. It is very difficult to get a good seal if the opening of your DIY bag does not lay completely flat. If you have built a bag and your seams are not at the edges of the bag, it's best to use method 3 below.
- To remove the closure, pull the C-channel off of the PVC tube starting at one end and work toward to the opposite side until the closure is released.
Method 2: Tube & Sleeve or C-Channel Closure (Home-Made)
Suggested by Dan S. of Niskayuna, New York
I bought a piece of closet rod stock - 1 1/8" round slightly longer than my bag. I also bought a piece of schedule 40 1-1/4" ID PVC pipe. I ripped a slot in the pipe so what remains is slightly more than 1/2 way around - just enough so I have to apply a little pressure to snap it around the closet rod. Now I wrap the bag opening around the rod, snap the pipe over it and I have a near perfect seal.
|
Method 3: DIY Dowel Closure
|
|
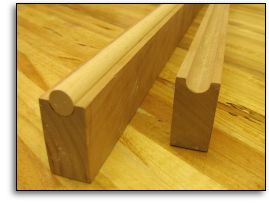
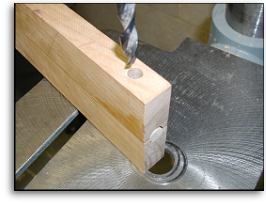
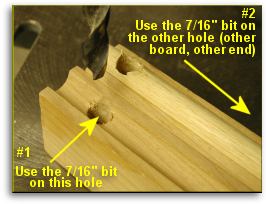
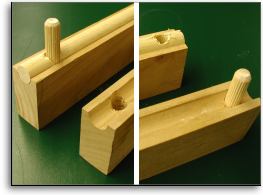
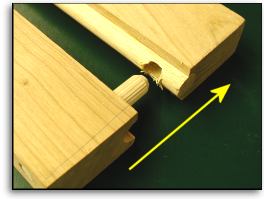
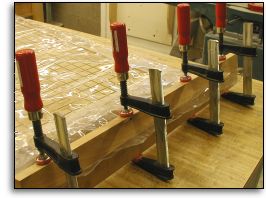
A Tip from Farrell Boris of Old Westbury, New York: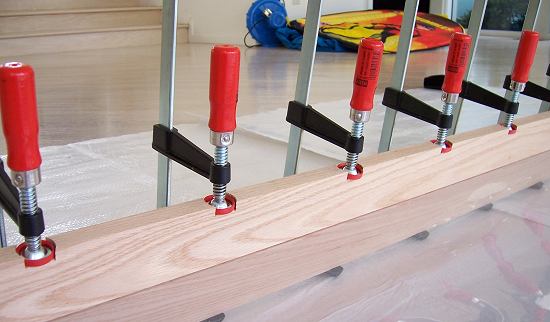 My bag clamp has "pockets" in it spaced evenly apart to accept the bar clamp. This allows the clamp to stay seated when tightening without the "wander" and also ensures even spacing between clamps. I used the appropriate diameter spade bit in my drill press and made each pocket deep enough to seat the clamp pad flush with the top of the bag clamp.
Part 4: Making the Bag Air-Tight: The Secret
When the bag is complete, attach it to your vacuum press. Set the bottom platen and a full-size piece of breather mesh inside. Then clamp the bag shut and turn on the press.
When at least 10" Hg of vacuum is achieved, use the vinyl cement to "paint" the outside edges of all previously sealed seams. Again, do this in a well-ventilated area. Vacuum will pull in the cement if any leaks exist. Immediately turn off the vacuum press and let the cement cure for another hour (or 24 hours if using polyurethane). That should seal any small leaks in the seam and the bag should now hold vacuum very well.
 |
|
 |
|||||||||||||||||||||||||||||||||


All Content ©2026 VeneerSupplies.com™
Terms and Conditions | Privacy Policy | Contact Us