






Categories
- Raw Wood Veneer
- Paper-Backed Veneer
- Edge Banding
- Vacuum Press Items
- Veneering Supplies
Shop by
Veneer Species
Build Your Own Vacuum Press

Veneer Supplies Newsletter



Vacuum Bag Platen Boards
A flat veneer panel starts with a flat base board
A platen board inside the vacuum bag serves two purposes. It helps to keep the veneered panel flat while the glue is setting up. And second, the grooves on the top platen allow air to flow out of the vacuum bag to the vacuum source thereby creating an evenly distributed level of vacuum inside.

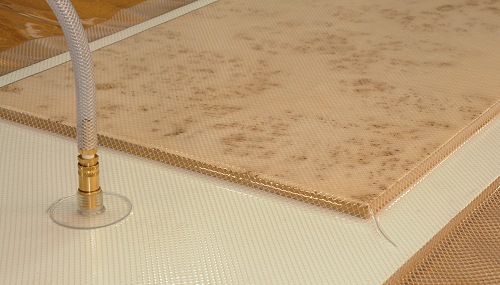 Veneering with a two-piece platen system as described below is fine for small to medium size flat panels, but it is a bit "old school". It's much easier to use breather mesh instead of a top platen. You can completely skip this page about two-piece platens if you are using breather mesh.
Check out this article and give it some thought!
Platen Material
If you are not using breather mesh, you'll need to make 2 platens from 3/4" melamine board. The benefit of melamine (instead of plain plywood or MDF) is that it prevents the veneered panel and any excess adhesive from sticking to the platens. A coat of paste wax will ensure easy removal of the veneered panel from the press. The wax will last though many glue-ups.
You can find 4' x 8' white melamine sheets near the plywood aisle in most of the larger lumber and hardware stores.
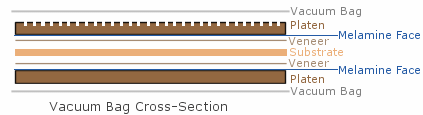
The platens should be at least 4 inches smaller than the inside measurement of the vacuum bag. This will prevent the vacuum bag from stretching at the seams which will cause the bag to split.
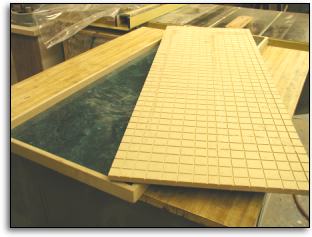
The bottom platen can have an optional border (approximately 1-3/4" tall) around the outside perimeter as shown in the following picture. This bordered bottom platen will help keep the top platen in place while in the press. The length and width of top platen should be 1/4" less than the bottom platen to allow easy removal after the pressing cycle is complete.
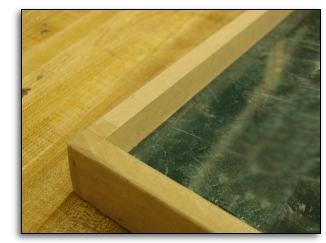
The life of the vacuum bag can be significantly increased by easing the edge of the platen system (top, bottom, side edges) using a 3/8" radius round-over bit. Otherwise, the sharp edges of the platen system can stress or even puncture the vacuum bag while under pressure.
Next, set your table saw blade to a height of 1/8", and cut grooves from the front to the back and side to side on the outside of the top platen. No grooves are needed on the bottom platen, though many users cut them any way. The spacing of the grooves on the top platen is not critical but a 1 to 3 inch layout works well.
These grooves will direct the air to the bag stem and are absolutely necessary. Remember, these grooves are on the outside when you place them in the vacuum bag.
 Platen Spacer Blocks
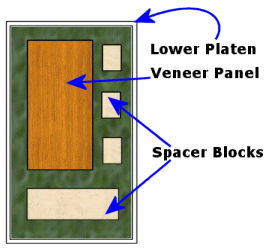
You may have an issue if your soon-to-be-veneered panel leaves a gap of 2" or more around the border. The top platen will cave in around the edges of the substrate while under pressure.
To remedy this, simply cut a few extra pieces of the substrate material and use them as spacers between the two platens.
Be sure these spacers are the same thickness as the substrate being glued to the veneer.
 |
|
 |
|||||||||||||||||||||||||||||||||


All Content ©2026 VeneerSupplies.com™
Terms and Conditions | Privacy Policy | Contact Us