






Categories
- Raw Wood Veneer
- Paper-Backed Veneer
- Edge Banding
- Vacuum Press Items
- Veneering Supplies
Shop by
Veneer Species
Build Your Own Vacuum Press

Veneer Supplies Newsletter



How to Apply Wood Veneer Edge Banding
The easy way to adhere hot melt wood edge banding to a plywood or MDF panel
It's often easier and more economical to build a project with plywood than with solid lumber. The main drawback is that the edges of the plywood must be covered so that the panel will look as close as possible to a piece of hardwood lumber. The two most common solutions are hardwood edging and pre-glued veneer edge banding.
Hardwood edging is simply a wood strip that is glued and clamped to the edge of the plywood. This method allows the builder to use a wide array of router bits to create a pleasing edge design. However, it can be tricky to sand the top of the hardwood flush without sanding through the veneer on the plywood. And the application of hardwood edging is more time-consuming than iron-on edge banding.
If the project calls for a basic straight edge on the plywood, veneer edge banding may be the perfect option. The edge banding we refer to in this article has a very durable hot melt adhesive on the back. Edge banding is real wood veneer that is pre-sanded and available most commonly in a 7/8" width. This is ideal for 3/4" thick sheet goods such as plywood and MDF because it allows a bit of overhang and makes it easy to trim it to a flush edge.
How to Apply Pre-Glued Hot Melt Veneer Edge Banding
Pre-glued edge banding is very easy to work with, and professional results can be achieved with a minimal amount of inexpensive tools. Here is what you'll need...
- Clothes Iron*
- Edge-Trimmer Tool
- Woodworking Chisel (1" wide is ideal)
- Hammer
- Sandpaper or Block Plane
* Almost any clothes iron will work, but we've found that smaller travel size versions are the easiest to use. Consider buying one instead of "borrowing" the one that your spouse uses to iron your Sunday best. There's nothing quite like the look of confused disgust when there is hot melt glue coming off the iron and spreading onto a clean pair of pants... especially when you're already late for work or church!
Avoid this common mistake: Do not seal the edges of the panel with shellac or any other coating. The hot-melt adhesive on edge banding adheres best to a porous and slightly roughened surface.
Step 1: Cut the Edge Banding to the Approximate Size
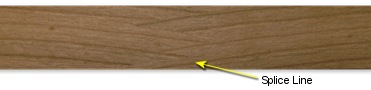
Cut a piece of edge banding about 1" longer than the length of the panel that you are banding. You can use scissors to cut it or simply fold it in half and it will snap apart. If you're planning to use a dye or any high-penetration stain, pay attention to splice lines in the edge banding. These zigzag lines occur randomly throughout the roll and are mostly invisible if you are only applying a clear coat, but some dye stains can make them more visible.
If the edge banding is being applied to two joining sides, it is best to work with the least visible side first. For example, if the edge banding is being placed around the four side edges of a rectangular piece of plywood, then start by edge banding the back side edge. Then move on to the left and right sides, and finish up by applying the banding to the front side of the material. This will help to hide the corner joints in an easy and eye-pleasing way.
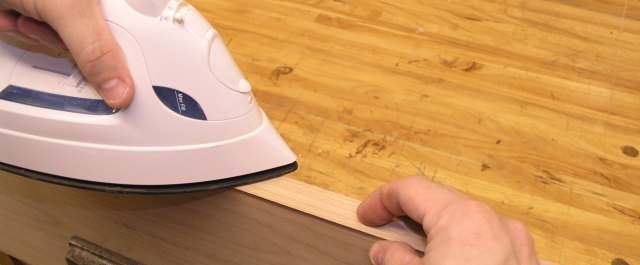
Step 2: Heat It Up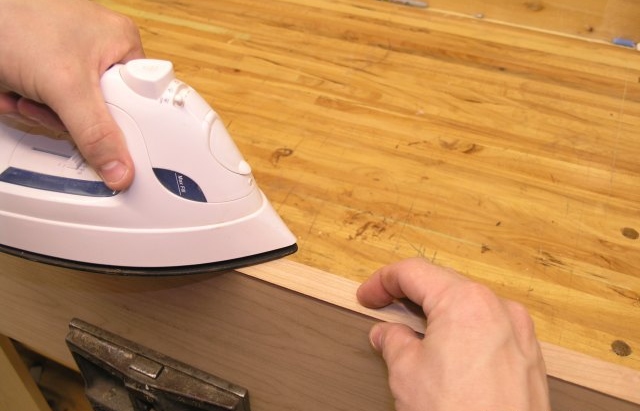 Turn on the clothes iron and set the temperature to the "high" or "cotton" setting. The ideal temperature is 390°F. Consider clamping the panel in a bench vise in the upright position so the clothes iron can be held horizontally. Start by placing the edge banding near one end of the panel and center it on the edge. The banding is slightly wider than the panel thickness so it is not critical that it is lined up perfectly with the edge. You can make minor adjustments to keep the banding straight as you go along.
Start at one end of the banding and work towards the opposite end with the iron. Move the iron slowly along the banding while applying downward force. Keep your fingers away from the heat and exercise care to avoid getting splinters from the edge of the banding. The hot melt adhesive requires roughly 20 seconds of time under the hot iron.
Some suppliers suggest pressing the edge banding in place for 20 seconds and then taking up the clothes iron and moving further down the edge and repeating the pressing. That may not be necessary or even ideal, so just press the iron down on the first section of banding and wait 10 seconds. Then continue moving the iron along the edge slowly so that every inch of banding has been under the iron for about 20 seconds.
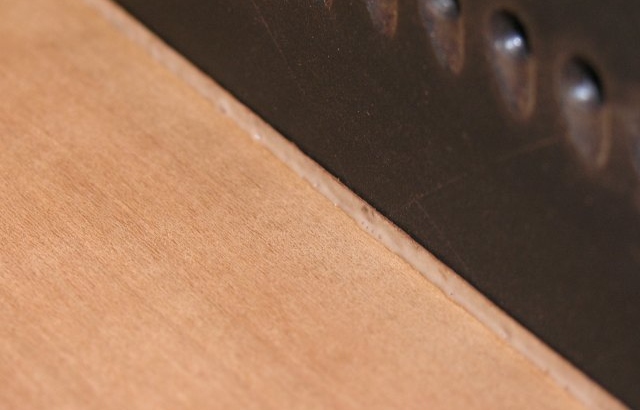 A small bead of adhesive "expand-out" should be visible from the underside of the banding if the adhesive is activating. To get the best bond possible, go over the edge banding with a block of wood or MDF (held at a 45° angle) immediately after each side of the panel is ironed down. For the most part, the hot melt adhesive can be worked for about 45 seconds after it has been heated.
If the side edges of the banding lift slightly from the substrate, simply use the block of wood or MDF to press the edge back onto the substrate while the adhesive is still warm. Reheat the banding if needed.

- Leaving the iron in one place too long can result in burning the edge banding so be certain to keep the iron moving.
- If using a pre-finished edge banding, place a cotton or flannel cloth over the edge banding to prevent the heat from marring the finish.

Be sure to unplug the clothes iron when the edge banding process is finished.
Step 3: Trim the Ends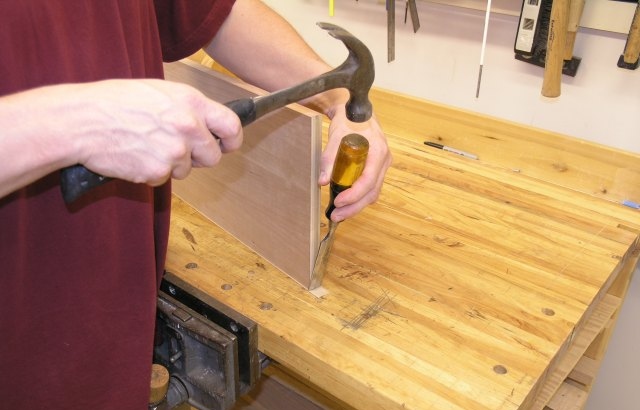 To trim the ends of the banding, it's easiest to stand the panel with the banded edge against a workbench. Hold a 1" chisel tightly against the side edge of the panel and strike the chisel handle with a mallet. This should cleanly slice off any banding that overhangs.
There are a few hand-held "end chopping" devices on the market, but a chisel and a hammer are all you need for this part.
Step 4: Trim The Edges
When the edge banding has cooled off, flush trim the top and bottom edges of the banding with any of these methods.
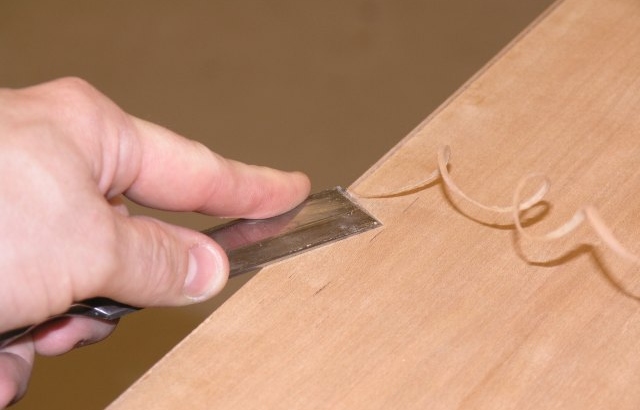 A sharp chisel can be used to trim the edges. Be sure to hold the chisel flat against the panel and hold the chisel at an angle so that the pressure presses the banding against the edge as shown on the picture.
This method often leaves a bit of tear-out on the banding but in the next section of this article, this rough area will be easily sanded smooth.
_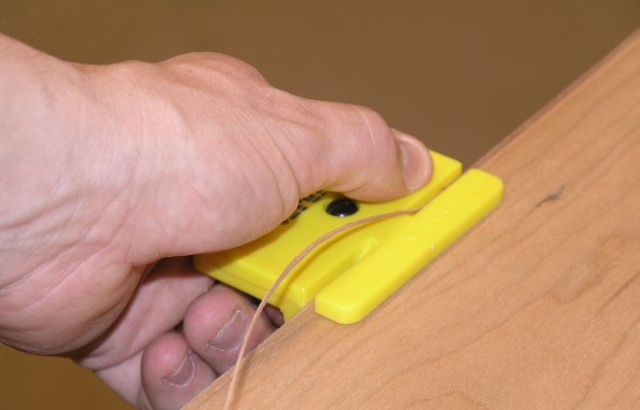 A flush trimming tool is inexpensive and definitely makes the trimming process easy. This tool is designed to trim fleece-backed wood veneer edge banding only. Don't use it to trim paper-backed or two-ply wood veneer. Simply press the trimmer against on to the face of the panel and slide it forward so that the blade cuts off the excess banding.
_
To get a clean edge, pay attention to the direction of the grain. Most edge banding has a reasonably straight grain, but there is almost always a slight angle in it. The best cut comes from sliding the trimmer in the direction of the grain as shown below. Cutting in any other direction will cause tear out.
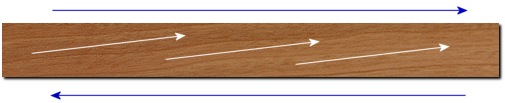
The white arrows above show the slight angle of the grain direction.
The blue arrows show the correct direction that the flush trimming tool is used.
- A flush cutting router bit will do a fine job of trimming the edge banding but to use it, the project panel will have to be stood on its edge. That can be a challenge on larger panels. And balancing a router on a 3/4" edge can also be tricky.
Step 5: Sanding and Finishing
The top and bottom faces of the plywood where it meets the edge banding can now be sanded. This will smooth out any irregularities left from the edge trimming tool or chisel.
To finish up, lightly sand the corner edges of the project panel. Use your hand to conform to the edge to get a softly rounded edge. Or use a sharp block plane to get a micro-beveled edge.
Veneer edge banding can be stained and finished with any conventional wood finishing products including lacquer, Danish oil, and oil based stain and polyurethane.
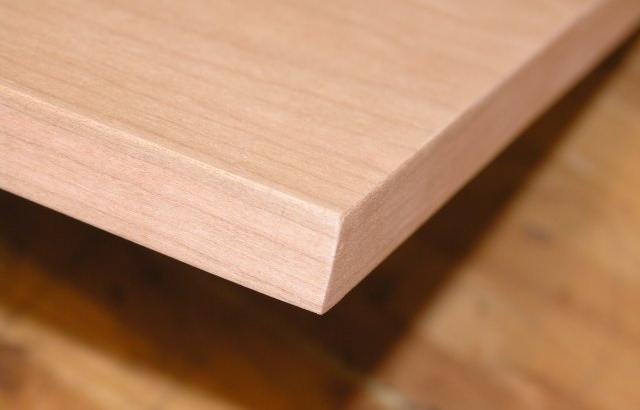
Make Your Own Edge Banding?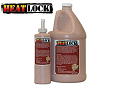 It can be difficult to find some species of edge banding. When this happens, the best option may be to make your own. Use scissors (for paper-backed veneer) or a veneer saw (for raw wood veneer) to cut your own edge banding from the veneer stock used on the other parts of your veneered panel.
Then use Heat Lock™ glue to bond the banding to your project. With heat from a clothes iron, you can bond any non-glued edge banding, including one cut from a piece of veneer to any porous substrate.
 |
|
 |
|||||||||||||||||||||||||||||||||


All Content ©2026 VeneerSupplies.com™
Terms and Conditions | Privacy Policy | Contact Us