






Categories
- Raw Wood Veneer
- Paper-Backed Veneer
- Edge Banding
- Vacuum Press Items
- Veneering Supplies
Shop by
Veneer Species
Build Your Own Vacuum Press

Veneer Supplies Newsletter



Dealing with Veneer Defects
How to fix pinholes, cracks, voids, and bark patches in veneer
Even the best veneers can contain holes, splits, and other surface imperfections that may need attention before or after being applied to a panel. Fortunately, many of these problems are easy to repair. Here's a brief list of methods to tackle these veneering concerns.
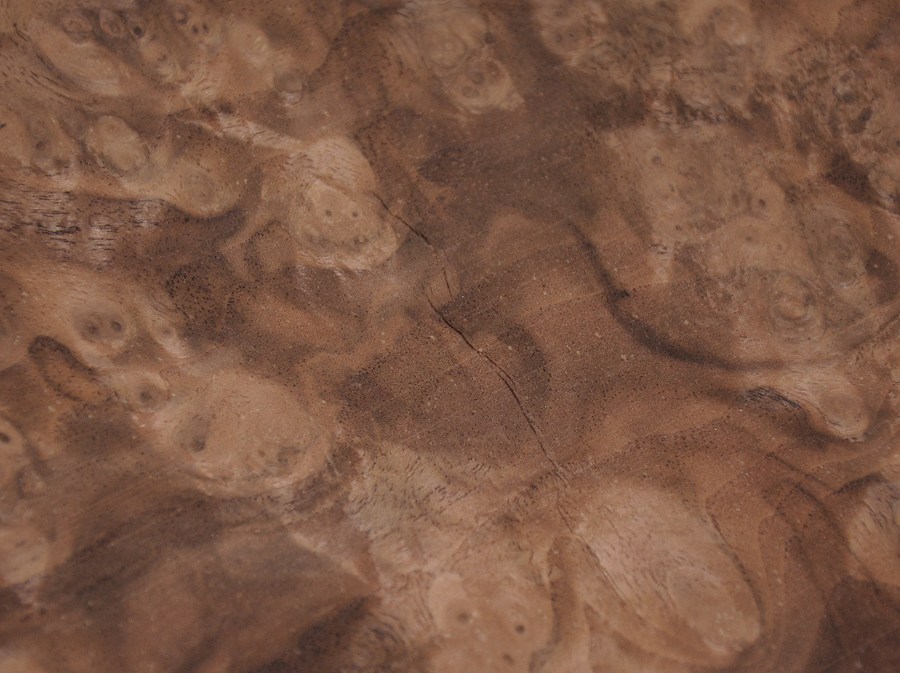
PinHoles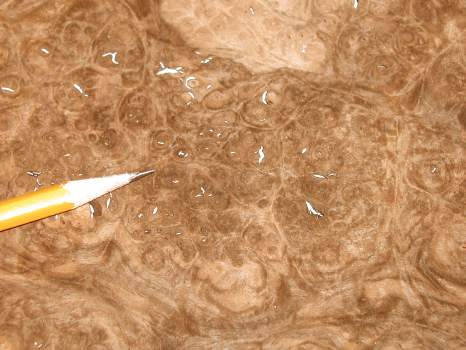 Small holes are common in burl veneers. They are typically created when the wood cells shrink during the drying process at the mill. The picture on the right shows excessive holes, but this is still a very nice veneer that will look fine when properly finished.
An appropriate tone of veneer glue will often fill in this type of defect. We offer veneer glue in light, medium, and extra dark tones. Hole filling is especially easy if breather mesh is used along with a vacuum press. This is because the mesh allows the glue to be pulled through the pinholes. The glue will fill the hole and cure slightly above the surface, which allows the user to remove the excess, leaving behind a smooth surface ready for finish sanding.
If the pinholes are not filled after vacuum pressing the panel, a custom wood filler can be made by mixing fine sawdust (the kind found in the dust collection bag on a random orbit) with veneer glue. In some cases, glue alone can be used as a spot filler. Another option is Elmer's Stainable wood glue. This adhesive can be tinted with Transtint liquid dyes to just about any color.
To apply a filler, brush one or two light coats onto any areas that require filling. Sand or scrape the surface when the filler has dried. It's important to exercise care to prevent accidentally sanding through the veneer face. Go slowly and watch for changes in the color and texture of the veneer. If a change becomes visible, stop and examine the panel closely. If the veneer is too thin, you may need to do a creative inlay or color that area with a toner in the finish coating.
For a glass smooth surface, a grain filler is needed. This is especially useful on coarse-grained veneers like oak and ash. Several grain fillers are commercially available, and most take a stain and finish very nicely.
Voids (Large Holes)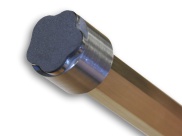 The easiest way to repair large holes is with a veneer punch, also known as a cloud punch. We no longer offer these punches, but they may be available from other sources. Do not use a veneer punch on any veneer that is more than 1/40" thick.
It is critical that a spritz of veneer softener is sprayed on the veneer surface a minute or two before punching out a defect to make a clean cut without damaging the tool.
Once the softener has been applied, place a piece of soft wood under the defect area on the veneer and use the tool to punch out the defect. It's best to use enough force to make the cut in one strike of the hammer. It takes just a bit of practice to learn the amount of force that is needed. Avoid damaging the punch by striking it with too much force. Practice on some scrap veneer, starting with a mild hammer strike and building up force until you get a sense of the effort required to get a clean cut.
Place the keeper veneer on top of a sacrificial veneer sheet and use the punched-out hole as a window to see the grain on the bottom sheet of veneer. Slide the top veneer over the bottom sheet while looking for an ideal grain pattern that best matches the grain in the top/keeper sheet. Use a pencil to lightly mark the location on the bottom sheet once you've found an area that has a pleasing grain match.
Set the top sheet aside, and spray the sacrificial sheet with veneer softener. Let it sit for a minute or two so the softener has time to make the wood cells flexible. Place a piece of soft wood under the sacrificial veneer. Align the punch with the pencil outline and strike the punch with a hammer. Now set the patch into the hole in the keeper veneer and apply a small piece of veneer tape to the top of the veneer sheet to hold the patch in place while being pressed. The tape can be removed after the veneer has been glued to a substrate.
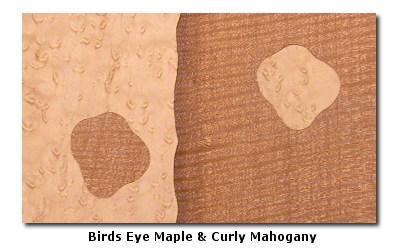
Some books suggest that the edge of a piece of galvanized pipe can be sharpened and then bent in a vice to make an irregular-shaped cutting edge. We've tried this many times and never had any luck making a perfect cut. Even some of the pictures in these books show evidence of a rough and uneven edge. We wonder how durable the edge of a piece of non-hardened steel can be made.
Bark Patches
Sometimes patches of bark in burl veneers can add a nice character to the piece. A veneer punch can be used to remove it, but if you would like to keep the bark patch, just veneer the piece as usual, and after the veneer glue has cured, dab in some thin cyanoacrylic glue (super glue) to the bark. This will give it some rigidity before sanding. Keep in mind that this can affect the veneer's ability to take a stain, so try to apply it only to the bark area.
Raw Veneer Cracks & Splits
An end or edge split in a raw wood veneer can usually be fixed before it is applied to the project panel. The rule of thumb is that if the split is man-made (such as from rough handling), then it should be easy to fix, and the repair will likely be invisible.
 Man-made splits can be pulled back together with veneer tape. Simply apply veneer tape to the face side of the veneer while holding the split tightly together. Then apply the veneer to the project using a cold press veneer glue. When the panel has cured, remove the tape by lightly wetting it, and then sand the surface once it has dried. This technique will not work with veneers applied with the iron-on technique since the heat will cause the wood cells to shrink, which then causes the split to open up even further.
 Cracks can also occur when a veneer loses too much moisture (or loses moisture too quickly). When this happens, internal stresses become so strong that the wood cells shrink, lose elasticity, and then separate from each other. These types of splits are more challenging to repair, and the success rate for repairing this type of crack depends on many factors.
Lay a damp paper towel under and over the split area on the veneer. Do not put water directly on the veneer, but be sure to moisten the entire surface of the paper towels. The added moisture will help gradually to expand the wood cells around the split, which will decrease the gap. It's best to place a piece of wax paper over and under the paper towels. Then place a board on top with some weight on it. This weighted board will minimize any wrinkling that can occur from the added moisture. The wax paper prevents the moisture from being wicked into the weighted board. Allow this to sit for 30 minutes. If the veneer is capable of being repaired, the width of the split will have decreased dramatically.
When the split has been minimized via moisture, apply no-hole veneer tape across the split on the face side of the veneer. To get the best results, place tape on one side of the split. Pinch the end of the tape between the veneer and your thumb. Then gently pull the tape tightly across the split as you use finger pressure to close any remaining evidence of this imperfection. When the veneer and tape have dried, adhere the veneer to the substrate as soon as possible to prevent any further splitting.
Finished Panel Cracks & Splits
Though it is rare, a split can appear after a veneer has been applied to the project surface. The repair may not be perfect, but there are steps that can be taken to reduce the visibility. Epoxy is often the easiest fix.
 After pressing the veneer, any remaining blemishes can be filled in with a stainable wood putty. For some, the favored filler is epoxy. This works very well if there are no plans to stain the finished project. Five-minute "quick set" epoxy works best. Allow at least an hour for it to fully harden and then scrape or sand it flush. Be careful to avoid sanding through the veneer face. If the sand gums up with epoxy, wait longer for it to completely cure.
Epoxy dries clear, and in some cases, this may be considered an advantage. However, if a wood tone is needed, add some sanding dust to the epoxy (preferably of a species similar in color to the veneer). A random orbit sander can provides the fine powder-like dust that blends well into epoxy. Keep in mind that epoxy will not absorb stain so if you are planning to stain the project, be sure to tone the epoxy with sanding dust that resembles the color of the stain that will be used on the panel.
 |
|
 |
|||||||||||||||||||||||||||||||||


All Content ©2026 VeneerSupplies.com™
Terms and Conditions | Privacy Policy | Contact Us