


Categories
- Raw Wood Veneer
- Paper-Backed Veneer
- Edge Banding
- Vacuum Press Items
- Veneering Supplies
Shop by
Veneer Species
Build Your Own Vacuum Press

Veneer Supplies Newsletter
Podz™ Vacuum Clamping Jigs


![]()
|
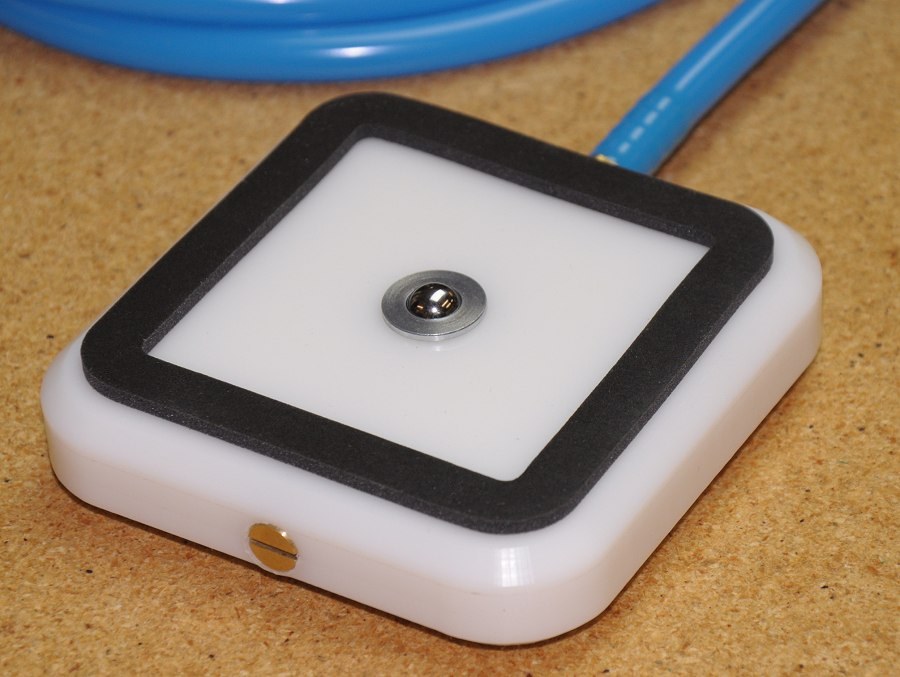
Podz™ are simple vacuum jigs designed to affordably clamp projects to your bench top. Using the power of your VeneerSupplies.com vacuum press and clamping system, the Podz™ 26-piece kit allows you to configure the clamping jigs any way you choose to clamp projects as small as 4" x 4" and as large as 5' x 4'. Purchase additional Podz kits, and you can expand the project size to panels of any size! With the Podz™ system, you can vacuum clamp work pieces to your bench top for routing, sanding, trimming, sawing, carving, dovetailing, staining, planing, scraping, and more. Each Podz™ clamping jig is made from high density polyethylene and is pre-drilled and pre-tapped. Assembly is quick and simple. Use two Podz jigs for small work, or link multiple Podz together for larger panels. A set of four spring-loaded ball valves is included with each Podz™ jig, which allows you to pre-arrange the jigs on your work bench (with the vacuum source turned on). These valves reduce the loss of vacuum pressure and keep the jigs in place until the work piece is ready for clamping. Kit Contents:
Assembly Time: 10 minutes Optional Replacement Gaskets
|
|


Requirements:
To use the Podz™ jigs, you will need a vacuum press and a foot-operated vacuum clamping unit. For Project EVS-2 and V4 vacuum press systems, the vacuum clamping add-on is required to control the flow of pressure from the vacuum reservoirs. If you own an Excel 1, 3, or 5 vacuum press system, you will only need an electric foot-pedal switch to control the vacuum pump system.
Notes from Joe:
- Podz™ clamping jigs work best on non-porous surfaces. This includes your bench top. If you have a porous wood bench top, the vacuum pressure will be diminished. In this case, I recommend applying several coats of oil based polyurethane to seal the pores and allow maximum vacuum clamping pressure.
- Porous woods such as oak and walnut will allow vacuum pressure to escape from the system. You can choose to allow this air to leak out and clamping pressure will be decreased. Alternatively, you can place blue painter's tape or even contact paper on the clamp side of the work piece. This will create a non-porous surface that can be clamped with vacuum.
- The Podz™ system is adjustable. You can cut the tubing to any size needed for the scope of your projects. I recommend using a 4-3-4 tube layout. This means four feet of tube from jig #1 to jig #2, three feet of vacuum tube from jig #2 to jig #3, and four feet of vacuum tube from jig#3 to jig#4.
- A set of four spring-loaded ball valves is included with each Podz™ jig, which allows you to pre-arrange each jig on your work bench (while the vacuum source operating). The valves minimize the loss of vacuum pressure and keep the jigs in place until your work piece in set on top.
*** Select the appropriate starter fitting based on your vacuum press.
- If you have the pnuematic foot pedal assembly for the V4 or EVS-2 vacuum press systems, select the "barb union" option above.
- If you have an Excel vacuum press system, select the "tube adapter" option above.
Need a custom sized vacuum jig?
We have all of the parts in stock to make your own vacuum clamping jig.
Questions & Answers
What is the purpose of the ball valve on each of the Podz™ units?
The ball valves do not hold a perfect vacuum seal, but they hold enough that you can place the Podz on your work bench, and they will not slide around while you are positioning the work piece on top.
How much vacuum flow do I need to make the Podz work properly?
That is a difficult question to answer because it depends on the porosity of the work bench surface and of the project you are clamping. Some woods such as oak and walnut are very porous, and it takes a lot of vacuum flow (CFM) to overcome the vacuum leak caused by the porosity. And if your work bench surface is also porous, then a vacuum clamping jig will require even more CFM. If you are clamping a non-porous material such as plastic to a work bench that has been completely sealed with a top coating, then a vacuum pump with as little as .5 CFM should work very well. The next factor is the maximum vacuum of the pump. Most users will find adequate holding power with just 15" of Hg vacuum. I've found that 3 CFM vacuum pumps that can create 25" of Hg vacuum work quite well with most surfaces for vacuum clamping with the Podz jigs.
Do I have to use all four Podz™ at the same time?
It depends on the size and porosity of the clamping material and the amount of clamping force required to hold down the work piece. Generally speaking, routing requires more clamping force than sanding.
Do I have to remove Podz jigs that are not in use while clamping?
That depends on the amount of clamping strength needed for the project. Unused Podz will leak a small amount of vacuum through the ball valve. To get maximum clamping force on small projects, remove any unused Podz jigs from the vacuum line. Use all four Podz jigs if you can fit them under your project.
Can I permanently mount the Podz jigs to a work surface?
Yes indeed. There are several ways to do this, but here is the method I feel is best. You will need at least two appropriately-sized coarse-thread screws for each Podz jig to be mounted. A screw at each corner of the jig may be advisable for some applications.
- Start by removing the bottom gasket from the Podz jig(s).
- Then mark the location for the jigs on a suitable panel where you wish to mount them. Trace the outside shape of the jig onto the top side of the mounting panel.
- Mark the location of the pilot holes for the screws on the panel, being careful that these holes will not go through the vacuum channels located inside the Podz jig. The mounting holes should be spaced at least a half-inch in from the edge of the jig. The diameter of the pilot hole should match the diameter of the shaft on the mounting screw. Depending on the application, you may need to countersink the holes into the panel surface to account for the head of the screw.
- Set the jigs in the correct position on the top side of the panel.
- From the back side of the panel, mark the location of the screw holes onto the jigs using the pilot holes for reference. A small Sharpie-like marker may be the best way to mark the back of the jig.
- Use an appropriately sized drill bit to bore holes into the jigs from the back side. The jigs are made from HDPE which is relatively soft, making the boring process easy. Do not bore all the way through to the face of the jig. This is critical. Only bore deep enough to allow the screws to attach.
- Cut two pieces of clear packing tape approximately 1.5" x 1.5". Cover the bottom hole of the Podz jig with both pieces of tape.
- Set the jig onto the top side of the panel and insert the screws from behind through the pilot holes. Firmly attach the screws to the jigs. The screws should be long enough to go through your panel and no less than 3/8" into the Podz jig.
I have seen a few users who simply opted to drill two holes completely through from the face of the jig (being careful to not go through the vacuum channels!) and then countersink the top of the hole. Then they put coarse-thread screws through the holes and attached the jigs directly to the top of the work surface, while leaving the bottom gasket in place.
How much clamping strength is generated by all four Podz™ together?
At 25" of Hg, the total clamping strength is approximately 345 lbs.
Why doesn't this product include the foot pedal?
The foot pedal is a critical part of controlling the flow of vacuum to the Podz™ system, but there are two types of foot pedals (electric and pneumatic). For the Excel™ vacuum press systems, you will need this kit and the electric foot pedal. For the V4™ systems, you will need the full vacuum clamping add-on kit, which includes a pneumatic foot pedal and several other items.
Will the Podz system work with a CNC router?
The Podz system is designed for bench top clamping only.
How do I connect and use the Podz jigs with a vacuum press from a different supplier?
You would likely have to remove any existing connector on the end of the vacuum tube and replace it with the "new" version of our lock-on connector. However, one issue you may find is that your existing vacuum press has no way to bleed the vacuum from the jigs when you turn the pump off. This could make it more difficult to remove the project from the Podz jigs.
Product Reviews
-
Way Better Than Old Fashioned Clamps
Review by John Turnbull
Rating:
I have wanted to try vacuum clamping for a long time. I am working on a project with large panels and figured this was the time. They far exceeded my expectations. The clamping strength on white oak is very good and I am currently only using a cheap AC vacuum pump. The construction is excellent and should last a lifetime with occasional gasket replacement. I would recommend ordering an extra 10 ft length of vacuum tubing to locate the pump farther away from the bench. Package came with a detailed set of instructions.
-
Amazing Jig with a Lot of Clamping Power
Review by Robert Colletti
Rating:
These things are amazing. I use them for holding down small furniture parts like drawer faces, cabinet tops, and doors while routing and sanding. Never had any idea that vacuum was so strong for this type of use. They are nicely machined from a very hard plastic so I'd bet they'll last a lifetime. You do have to assemble pieces but that only takes a few minutes. I bought these with the clamping kit that is sold here. Works like a charm. Very satisfied with this purchase.
-
Simple, Convenient, and Reasonably Priced
Review by Richard Cain
Rating:
I'm very happy with the Podz clamps. I'm using them to hold drawer fronts and solid doors for edge routing and sanding. Since the jigs keep these parts slightly elevated off my bench top, I can completely route around the edges in a single step. Vacuum is very powerful so the clamping strength is surprisingly good.
Shipping took only a day! The instructions that came with my shipment were easy to understand and clearly written. The customer service at Veneer Supplies is quite good. They reply to emails very quickly.
One word of advice is to get the extra set of gaskets. They stick really well and they are durable but twice I have accidentally rubbed off the gasket tape by not storing them as I should have. Get an extra set to have on hand!!
-
Impressed with the Ease of USe
Review by Ken Fitzpatrick
Rating:
I've had veneering products for several years and enjoy using them. The PODZ are new to me but I was impressed with the ease of use. Looking forward to using them in a lot of projects especially with my hand held router. I'd recommend these to anyone who needs obstruction free clamping on their workbench.
-
Worth Every Penny
Review by Richard Fomuke
Rating:
What a fantastic tool to hold down your project while you sand, route, plane your work, all with the expectation that they will not move. I can finally stop using hold downs which hinders your access to the whole piece.
-
Great Value!
Review by John Fuda
Rating:
This kit is a great value. I looked at several other vacuum clamping jigs and thought this was the best bang for the buck, especially when purchased at a discount in conjunction with the vacuum clamping add-on. They're easy and fun to assemble, perform great, and give you all sorts of flexibility in placement and clamping power.
-
The Podz Kit is Fantastic
Review by Edgar Lamb
Rating:
A couple of years ago I got the vacuum pump and kit from Veneer Supplies to do vacuum veneering. Since I had the vacuum source I thought I would try vacuum clamping. I bought the vacuum clamping Podz kit and it has been great. I can clamp a work piece anywhere on the workbench and there are no clamps to get in the way. I would recommend the vacuum clamping Podz kit to anyone in woodworking.
-
Great Product!!!
Review by Harvey Brotman
Rating:
These are great. Well made and bulletproof. Shipped fast and got here in just a couple of days. This has really helped on some of my CNC projects. Excellent response from owner, too!!! I would definitely recommend this.
-
Simple Functional Design but May Not Work with CNC
Review by Mark Muntean
Rating:
I have tried clamping "pods" from three different companies so far so I have some basis for comparison. These "Podz" have some specific design features that are different and important to note.
The Podz are simple in design which is good. They use flat rubber gaskets that adhere to the otherwise flat surface rather than a round o-ring type gasket that fits in a carved channel. This is simple and works, but your work piece when clamped is now sitting on a flexible rubber surface and has no contact with a surface to provide lateral friction. As such, you can wiggle your piece laterally a little bit. It will not come off, but it is not rigidly held in place for aggressive machining where rigid clamping is required. Imagine being clamped down on flexible rubber feet. [Note from Joe: For bench top clamping, a sliver of movement is not an issue at all.]
The second consideration is that the pods clamp onto the underlying workbench surface using the same vacuum system. This means you cannot use them on a porous surface like MDF or a surface with T-Slots. [Note from Joe: This is not quite correct. Many of our customers will put packing tape over the bottom vacuum port and use drywall screws to secure the Podz jigs permanently to a piece of plywood or MDF.]
These two design characteristics mean they may not be suitable for clamping on a CNC milling machine.
[Note from Joe: Nowhere on my website does it says these suitable for anything other than benchtop clamping.]
The ball bearing valve is a nice idea but as mentioned they do leak a little. I can clearly see this in the vacuum pressure when the work piece has not yet be put in place. I think it may be best to disconnect unused additional Podz from the circuit rather than relying on these valves for pods not covered by the work piece. They do at least keep your vacuum pump from running hard while the work piece is off the clamps. [Note from Joe: The instructions explain that unused Podz jigs should be removed from the clamping system. It is absurdly simple to remove a jig from the line.]
Finally, another important and positive note. Of all the systems I have tried these have the best hoses for interconnection. Other brands/products have hoses that are too stiff and cannot be easily connected and disconnected. The hose from Veneer Supplies and the associated brass barb fittings are the best I have found - a perfect blend of good seal, flexibility, air flow, and ease of reconfiguration. The "quick connect" fittings that match the same hose are also excellent. I recommend them highly.
If you limit the evaluation to clamping on a workbench for sanding, edge routing, etc. I would give these 5 stars. I will need to come up with a homemade solution for CNC clamping but will be using hoses, fittings, and components from Veneer Supplies.
[Note from Joe: It's a shame that the user docked a star just because he is using the Podz for a job for which they are not explicitly not designed.]
-
Review from Eureka, CA
Review by Gabe Douge
Rating:
I just tried a couple of my Podz for the first time tonight. I tried one by itself & then the pair together. The single POD was more than enough to clamp some plywood scrap to my bench and then when I added the second one it added incredible stability and I couldn't pull the wood free until releasing the vacuum. Great product that will have a plethora of uses for around my guitar shop.
-
Review from Malad, ID
Review by Ed Dahle
Rating:
This is an outstanding system if you want to do vacuum clamping. Very versatile, easy to assemble, great instructions and well built. Everything you need is included in the kit. I can't say enough good about Joe and his wife for customer service and their desire to get you what you want, when you want it. I highly recommend this company and will do business with them again.
-
Review from Boulder, CO
Review by Dan Baldwin
Rating:
I received my Podz system a few weeks ago ago, set it up to make sure it functioned properly, then put them in a box. Two days ago I had to rout a profile around a large circular table top. I was trying to figure out how to clamp it so I wouldn't have to stop, rotate and re-clamp. I thought … PODZ ? …. no, surely it couldn't be strong enough to hold against pressing a bearing router bit against the work piece. I tried it just the same …it was absolutely strong enough and so easy to set up. The system really made it easy for me to make a continuous routing around the edge. Five stars for sure ! All of Joe's stuff comes with very clear setup instructions and consists of highest quality parts. There are very few venues these days where you know you will be getting the good stuff. I'm glad I found this place.
-
Review from Okotoks, Alberta
Review by Matt Lemay
Rating:
We ordered these on Christmas day thinking it would ship in the new year, to our surprise it shipped the next day! That's what you call service! The Podz are just as described.They work like a dream with our 6 CFM pump. We got the foot valve, this is HIGHLY recommended ! Joe's site answers all the questions you could have, it is an amazing resource! We will definitely be back for more!
-
Great Product
Review by Dwayne C
Rating:
I have struggled trying to clamp boards on my ornamental mill. The Podz do a great job holding my stock. Before I would lose 1 out of every 10 pieces. After using these clamps for 2 days I feel confident that I will not lose any pieces in the future making my job more efficient and profitable. They have already payed for themselves. I use these with my V2 auto-cycling vacuum press kit that I purchased here, another great product. Keep up the good work Joe.
-
Well Worth the Money
Review by Lucas Brown
Rating:
I was skeptical when I decided to purchase these. I worked as a CNC operator in a large cabinet and millwork shop for a few years and we always had trouble holding down parts for machining, even with a huge $6500 vacuum pump. So I didn't really believe that my tiny (Excel 1) vacuum pump would have that kind of holding power. I couldn't believe how well these things work! They hold as well, if not better than our huge pump with the Nemi pods. I wish I would have bought them years ago. Well worth the money. Buy these now!
-
I wish I bought this a long time ago!
Review by Jim Arnott
Rating:
My vacuum press system from Joe Woodworker has been in frequent use for nearly two years. All along I kept wishing there was a way to use it for clamping. A couple of weeks ago, I was surfing this website and saw the Podz kit and ordered it right away.
As always, the kit arrived very promptly. It took only a few minutes to assemble and shortly thereafter, I was using it on my work bench to hold down a table table while routing.
I cant say enough good things about the Podz clamps. It works as described and even better. I cant wait to take this to my weekend warriors club to show it off!!!
-
Five stars!
Review by PJ Ballard
Rating:
I worked in a mid-size cabinet shop for a decade and we had a system similar to this one. The darn thing worked well but the individual pucks were super expensive and our CNC router would ocassionally cut into one. The boss would go nuts because they were a bit more high-tech (unnecessarily so). I'd venture a guess he was paying $50 per puck.
I was so delighted to find this vacuum puck system for my own shop. To think the whole system is under $70... well what more could you ask for? Of course, you already need a vacuum pump and a way to shut it off. I have a vacuum press system from a woodworking dealer here in California and it was no problem at all to get it to work with this clamping system.
Does it work? Hell yes! I can just imagine myself doing one of those old "Crazy Glue" commericials... hanging myself over a canyon supported only by a vacuum clamped board. Ha!
Everything else about my order is fine. Shipping prices were ok and it took about a week to get here. I had a tracking number so it was easy to follow the package. The instructions are clear and simple. This is a nice addition to my daily-use tool collection.
-
Simple, effective, and cheap!
Review by Wendell H. Smith Jr.
Rating:
It's amazing how something so simple could work so well. The HDPE parts are nicely made and they are just the right size to work with any configuration that I could think of. I have an older V2 vacuum press and clamping option that I bought from Joewoodworker and this jig system is the icing on the cake.
My work bench was not porous so I had some trouble with getting the clamps to get full sucking power. So I put down a coat of polyurethane on my bench and wow what a difference that made. Now I am pulling the full vacuum on my project and the clamping is so strong that it would take an mule team to pull a project off the jigs.
-
5 Stars!
Review by Eric K.
Rating:
I used Podz with my Excel 1 vacuum system and I thought it might be a bit under-powered. Surprise! It still works perfectly. It clamps down my project in a matter of 2 to 3 seconds. I cant begin to explain how satidfied I am with this set up. For the money, you just cant beat it.
-
Just got them and I love them already!
Review by Doug "Grouch" Murphy
Rating:
Oh how I love simple things. The jigs are wonderful. I use them mostly for sanding and its wonderful to have full access to the project while sanding. No more rata-tat-tat of the project bouncing around on my workbench. No more holding my boards with a death grip to keep them from spinning out from the random orbit sander. For these two reasons alone I'm a better (and less grouchy) woodworker. Thanks to Joe for the great support, fast shipping, excellent product, great prices, etc, etc. I could go on and on!
-
Vacuum Press Companion
Review by Kevin Hall
Rating:
My projects run the gammut from small to large and simple to complex. Clamping is never difficult but my bench clamps do seem to get in the way sometimes. What I like about these vacuum clamps is that they stay under the project so you can route all the way around the board without stopping and having to remove a bench clamp. The vacuum pressure is astonishingly strong (even from my little pump) and the grip is more than adequate. For what it does at this price, you cant complain. My kit arrived on schedule it certainly meets my needs. I highly recommend it if you have a vacuum source and a controller.
-
I saved big time.
Review by Ray Sullivan
Rating:
These things are great. I use them in a production shop and we just screwed them directly onto our work bench top since they never need to be moved.
They work perfectly and I have to thank Joe for putting them in my hands. He sent me his very first Podz kit for testing and its been a perfect solution for my door assembly process.


 |
|
 |
|||||||||||||||||||||||||||||||||
All Content ©2026 VeneerSupplies.com™
Terms and Conditions | Privacy Policy | Contact Us
![]()

